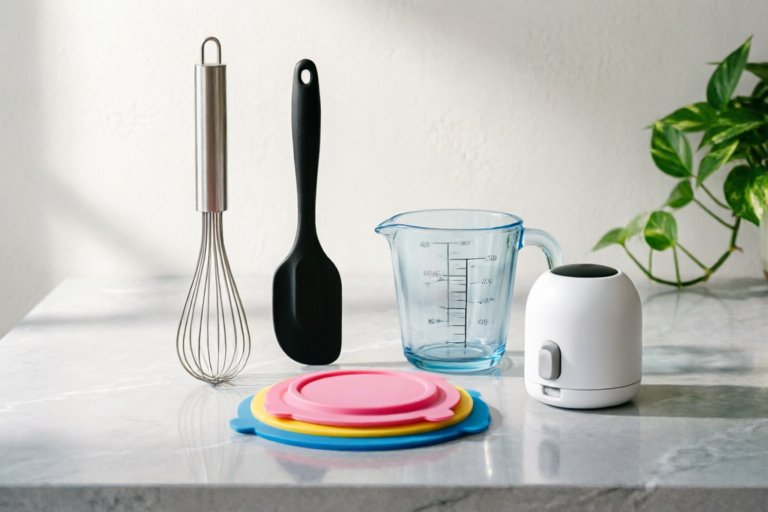
# Top 5 Best Kitchen Gadgets For Beginners Starting Out Today
## Introduction: Navigating the Basics for New Cooks
Welcome to the culinary world! Whether you have just moved into your first apartment, decided to take control of your diet, or simply want to impress friends with home-cooked meals, the journey begins in the kitchen. However, for many, the prospect of standing before a stove and chopping board can be filled with apprehension. The sheer volume of equipment available in modern hardware stores, big-box retailers, and online marketplaces can lead to analysis paralysis. You might wonder: Do I really need five types of spoons? Is a food processor worth the counter space? How do I know which pan won't ruin my food?
The truth is, cooking success relies less on having every single tool on the market and more on mastering the fundamentals with the right core tools. Selecting the right tools prevents overwhelm and builds culinary confidence during the initial learning phase. When you have reliable, functional instruments, your focus shifts from struggling with technology to focusing on the ingredients, flavors, and techniques. This psychological shift is crucial; it transforms cooking from a chore into a creative outlet.
In this comprehensive guide, we will walk you through the absolute essentials. We aren't here to sell you a lifetime subscription to a meal kit service or convince you to upgrade your appliances immediately. Instead, we are identifying the five foundational gadgets that offer the highest return on investment for new cooks. These are the tools that appear repeatedly in professional kitchens and home kitchens alike, not because they are flashy, but because they work. By investing in these five items, you set a strong foundation upon which you can build your personal culinary empire.
Let's dive into the arsenal that will help you chop, sear, measure, blend, and eat with confidence.
---
## 1. The Indispensable Chef’s Knife
If there were only one purchase to make on day one, it would be a high-quality chef’s knife. While you can technically peel an onion with a dull paring knife or slice bread with a butter knife, doing so consistently leads to frustration, uneven cuts, and potential safety hazards. A versatile eight-inch knife is widely considered the industry standard for home chefs, particularly for safely chopping vegetables, fruits, and preparing various proteins efficiently.
### Why Eight Inches?
The eight-inch blade length offers a perfect balance between precision and leverage. Shorter knives are great for detailed work like deveining shrimp or mincing garlic, but they lack the surface area needed for efficient bulk cutting. Longer knives (ten inches) often require more skill to control and can feel unwieldy for someone new to the kitchen. An eight-inch chef’s knife allows for a rocking motion that speeds up prep time without sacrificing control. It acts as an extension of your hand, capable of slicing through chicken breasts, dicing carrots, and crushing tomatoes with equal competence.
### Key Features to Look For
When shopping for your first major tool, consider the following:
* **Forged vs. Stamped:** Forged blades are cut from a single piece of steel and then hammered, resulting in a heavier, more durable knife with a bolster (the thick part where the handle meets the blade). Stamped knives are laser-cut from sheet metal and are lighter. For a beginner, a mid-range forged knife provides better weight distribution and longevity, reducing hand fatigue over long prep sessions.
* **High-Carbon Stainless Steel:** Pure stainless steel resists rust but can be soft. Pure high-carbon steel holds an edge exceptionally well but rusts easily. High-carbon stainless steel is the sweet spot, offering durability, edge retention, and stain resistance. Look for this material composition to ensure the knife lasts for years.
* **Ergonomic Handle:** Comfort is paramount. Handles made of wood, polypropylene, or composite materials often provide a better grip when wet compared to cheap plastic. Ensure the handle does not slip when handling oily produce.
### Safety and Usage Techniques
Using a sharp knife is actually safer than using a dull one. A dull knife requires more force, increasing the likelihood of slipping and cutting yourself. Invest in a honing steel or a sharpening stone and learn how to maintain the edge. Keep your fingers curled in a “claw” shape when holding the food you are cutting; this keeps fingertips away from the blade path. Also, never wash a chef’s knife in the dishwasher. The high heat and agitation can damage the handle and the edge alignment. Always hand wash, dry immediately, and store in a block or on a magnetic strip.
### Maintenance Tips
To keep your knife performing optimally, wash it by hand after every use. Dry it thoroughly to prevent corrosion. Store it securely so the edge doesn’t bump against other utensils. If you notice it dragging rather than slicing, hone the edge regularly (once a month for heavy use) or have it professionally sharpened once or twice a year. Treating your knife with respect ensures it remains a trusted companion in the kitchen for a decade or more.
---
## 2. The Multi-Purpose Non-Stick Skillet
Moving on from cutting, cooking is where most beginners spend their time. The heart of your stovetop cooking will be a durable frying pan. While there are options ranging from carbon steel to stainless steel, a multi-purpose non-stick skillet stands out as the most forgiving and user-friendly option for novices. Its primary value lies in the ability to saute, fry, and sear foods without them sticking to the surface, ensuring easy cleanup after cooking.
### The Importance of Non-Stick Coatings
For beginners who may be still learning heat management and oil ratios, a traditional stainless steel pan can result in burnt eggs or stuck-on sauces that require hours of scrubbing. This negative reinforcement often leads to abandoning cooking. A high-quality non-stick skillet mitigates this risk. With proper use, even a small amount of butter or oil creates a barrier that allows food to glide effortlessly. This encourages experimentation; you don’t fear ruining a meal because the cooking surface works for you.
### Choosing the Right Pan
Not all non-stick pans are created equal. To get the most out of this tool:
* **Size Matters:** Opt for a 10-inch or 12-inch diameter skillet. This size accommodates family-style portions of pasta, stir-fry, or two whole chicken breasts simultaneously. Smaller pans restrict heat circulation and overcrowding, leading to steaming rather than browning.
* **Construction:** Look for a pan with a hard-anodized aluminum base. This ensures even heat distribution, preventing hot spots that scorch food in the center while leaving the edges cold. Cheap aluminum cores can warp on high heat, causing the bottom of the pan to wobble.
* **Handle Design:** Ensure the handle stays cool to the touch, or has a silicone coating, during stovetop cooking. Long handles also provide better leverage for tossing food.
### Care and Longevity
Non-stick coatings have a lifespan, typically lasting 3 to 5 years with daily use. To extend this life, avoid preheating the pan empty on high heat, as this can degrade the coating quickly. Use wooden or silicone utensils; metal cutlery can scratch the surface. Never put a non-stick pan in the oven unless the manufacturer explicitly states the temperature limit is safe. Cleaning is a breeze; wait until it cools, then wash with warm soapy water and a soft sponge. Harsh abrasives are the enemy.
### Versatility in Action
This skillet is incredibly versatile. You can use it to sear steaks (if the coating permits high temp), whisk scrambled eggs, brown onions for soups, or reheat leftovers. Because it heats up quickly and retains heat moderately well, it adapts to various cooking styles. Having this one tool covers approximately 60% of your daily cooking scenarios, making it the workhorse of your kitchen.
---
## 3. Essential Digital Kitchen Scale
While measuring cups are common in Western cookbooks, professional chefs and serious bakers almost exclusively rely on a digital kitchen scale. This shift might seem unnecessary for simple stovetop dishes, but for anyone looking to achieve consistent results, precise measuring for consistent baking results and accurate portion control in daily meals is indispensable.
### The Science of Baking
Cooking is often artistic, relying on taste and intuition. Baking, however, is chemistry. The ratio of flour to liquid to leavening agents determines whether your cake rises or turns into a dense brick. Flour density varies depending on how it is packed into a cup. One cup of flour can weigh anywhere from 120 grams to 150 grams. This variance changes the hydration level of the dough, affecting texture entirely. A digital scale eliminates this guesswork by weighing ingredients by mass (grams or ounces).
### Beyond Baking: Portion Control
For health-conscious individuals, a kitchen scale is vital for portion control. In a world of oversized restaurant servings, understanding the actual mass of your protein or carbohydrate intake helps manage caloric consumption accurately. Instead of eyeballing a serving of rice or chicken breast, weighing it removes the estimation error. This is particularly useful for tracking macros for fitness goals.
### Key Features of a Good Scale
When selecting a scale, prioritize the following:
* **Tare Function:** This is non-negotiable. The tare button allows you to zero out the weight of the bowl or container before adding ingredients. This means you can place multiple ingredients sequentially into the same bowl without resetting the math manually.
* **Capacity and Precision:** A scale should hold at least 5 kilograms (11 lbs) with 1-gram increments. High precision is key for spices and yeast, which require minute amounts.
* **Display and Readability:** A large LCD screen that displays clearly even in dim lighting is helpful. Some scales flip up to save space.
* **Material:** Glass surfaces are easier to clean than textured plastic platforms. They resist staining from spilled sugar or syrup.
### Usage Tips for Accuracy
Place the scale on a flat, stable countertop. Do not use it on uneven surfaces as this affects the sensor’s reading. Turn it on before placing a bowl to prevent the weight from being included by mistake. If using metric measurements, remember that 1 liter of water equals 1 kilogram, which simplifies some liquid measurements, though weight is always preferred over volume for liquids in professional settings. Calibrate the scale occasionally (some models have this feature) if you notice drift in readings.
### Building Habits
Start incorporating the scale into your routine immediately. Even if you aren’t baking, measure out your coffee beans or nuts for snacks. Using a scale fosters discipline and attention to detail in the kitchen. It teaches you consistency. Within weeks, you will find yourself relying less on visual cues and more on precise measurements, elevating the quality of your cooking automatically.
---
## 4. Time-Saving Handheld Immersion Blender
As you progress in your cooking repertoire, you will find yourself wanting to puree soups, make smooth sauces, or blend fresh shakes. However, buying a full-sized countertop blender adds bulk to your counter and complicates cleanup. Enter the handheld immersion blender. This compact appliance for creating smooth soups, sauces, and shakes without the bulk of traditional countertop blenders is a game-changer for small kitchens and busy schedules.
### Efficiency and Convenience
Unlike traditional blenders where you must transfer hot soup to a jar and blend, then deal with a bulky machine and a difficult-to-clean pitcher, an immersion blender goes directly into the pot. You can blend your risotto base or tomato soup right in the saucepan. This saves time, reduces the number of dirty dishes, and minimizes splatter risks associated with pouring hot liquids into a blender jar.
### Versatility of Application
Beyond just blending soup, these gadgets excel in several areas:
* **Smoothies and Shakes:** For breakfast or post-workout drinks, the immersion blender is powerful enough to crush ice (check the specs, some are better than others) and blend frozen fruit smoothly.
* **Sauces and Emulsions:** Making mayonnaise, salad dressings, or béchamel sauce is incredibly easy with the whisk attachment or the blending rod. It emulsifies fats and liquids faster than manual whisking.
* **Baby Food:** If you are planning a future family, this tool is invaluable for mashing cooked veggies into soft purees for infants.
* **Dips and Spreads:** Hummus, guacamole, and nut butters can be made fresh with minimal effort.
### What to Consider Before Buying
Selecting the right model depends on your usage frequency:
* **Power Wattage:** Look for at least 300 watts. Higher wattage motors handle tough tasks like frozen berries or nuts more effectively.
* **Attachments:** Many models come with whisks and choppers. These attachments expand functionality, allowing you to whip cream or chop herbs directly in the bowl.
* **Corded vs. Cordless:** Cordless models offer flexibility near sinks or islands but require charging. Corded models offer unlimited run time but tether you to an outlet. For dedicated kitchen use, a corded model often feels more robust.
* **Safety Lock:** Ensure the motor does not engage accidentally when you press the trigger.
### Cleaning and Storage
Cleaning is generally straightforward. Most heads are removable and dishwasher safe. However, hand washing is gentle on the motor seals. Simply dip the head in warm soapy water and pulse briefly to rinse off residue. For sticky sauces like hummus, let it soak for a few minutes before rinsing. Store it in a drawer or hang it on a hook next to your pots to keep it accessible but out of the way.
### Integration into Workflow
By owning this device, you remove the friction of making blended textures. There is no longer an excuse to skip making fresh pesto or creamy pumpkin soup because "cleaning up the blender is too much trouble." Eliminating this barrier encourages you to experiment with fresh ingredients and complex flavors.
---
## 5. Essential Accessories and Maintenance (Bonus Section)
While the previous four items form the core of your toolset, there are supporting elements that ensure these gadgets last. We discussed knife maintenance and pan care, but let's briefly address the environment surrounding these tools.
### Cutting Board Selection
You bought a knife, now you need a surface to cut on. Wooden boards (end-grain bamboo or hardwood) are gentle on knife edges but require oiling. Plastic boards are sanitary and dishwasher safe but can groove over time, harboring bacteria. A hybrid approach is ideal: use plastic for raw meat (for hygiene) and wood for produce. Ensure the board is large enough to give you room to maneuver the chef’s knife safely.
### Oil and Seasoning Management
Your non-stick skillet needs care, but your stove needs fuel. Keep olive oil, vegetable oil, and salt/pepper shakers within arm’s reach of the stove. A clutter-free zone around your cooking station improves efficiency. A simple oil dispenser with a pour spout prevents drips on counters. Seasoning is not just for cast iron; knowing when to add salt and acid (like lemon juice or vinegar) can transform a bland dish.
### Ventilation
Finally, ensure your kitchen ventilation is working. A range hood or open window prevents smoke buildup, especially when searing or using the skillet on high heat. Good air quality keeps you focused and comfortable.
---
## Conclusion: Simplifying Your Cooking Journey
We have covered the five pillars of the beginner’s kitchen: the versatile eight-inch chef’s knife, the multi-purpose non-stick skillet, the precise digital kitchen scale, and the compact handheld immersion blender. Together, these gadgets form a cohesive toolkit designed to handle the majority of daily cooking tasks without requiring specialized knowledge or excessive counter space.
The value of these core gadgets lies in their ability to reduce friction. Cooking should be a source of joy, not stress. By removing barriers like sticking pans, inconsistent measurements, or dangerous, dull knives, you free up your mental energy to explore recipes, develop flavor profiles, and enjoy the process of nourishing yourself and others. These tools act as bridges between intention and execution. When you know your tools will respond predictably, you feel confident enough to try harder things.
However, remember that this collection is a starting point, not the finish line. Encourage beginners to master fundamentals before expanding their collection further. Don’t rush to buy a stand mixer, a sous-vide machine, or a specialty pressure cooker until you have perfected the art of chopping, searing, and measuring with these basics. Often, the limitation in our cooking isn’t the tool, but the technique. Once you have mastered the basics with these five essential items, you will naturally discover exactly what additional tools you truly need to fill the gaps in your specific culinary style.
Take it slow. Build your skills alongside your equipment. Buy quality over quantity. With the right gear in hand and the right mindset, your kitchen will soon transform from a scary room full of unknown gadgets into a sanctuary of creativity and sustenance. Start today, pick up your first chef’s knife, and prepare to savor the delicious rewards of mastering your own kitchen.
Happy Cooking!
---
### Frequently Asked Questions
**Q: Can I use metal utensils on a non-stick skillet?**
A: It is highly discouraged. Metal can scratch the coating, exposing the underlying aluminum and reducing the non-stick properties. Use wood, nylon, or silicone.
**Q: How do I sharpen a chef’s knife?**
A: You can buy a pull-through sharpener for ease of use, but for best results, use a whetstone. Learn the angle (usually 15-20 degrees) and maintain consistent motion.
**Q: Is the kitchen scale necessary for savory meals?**
A: Not strictly necessary, but recommended. It ensures accuracy and helps with recipe scaling, such as doubling a marinade proportion.
**Q: How long does a good non-stick skillet last?**
A: Typically 2 to 5 years depending on usage frequency and care methods.
**Q: What is the best type of blade steel?**
A: High-carbon stainless steel offers the best balance of hardness, rust resistance, and sharpness for home use.